See ThirdEYE working

Real screens from the product. They were taken in a test environment with simulated alerts, so the names, hosts and counts are examples, not customer data.

A slow 2-minute tour with 3D scenes, captions and a cyber-style soundtrack. Sound starts when you press play. Screens come from a test environment with simulated alerts. The video loads only when you press play.

The control room

Where the SOC starts its day: what came in, what the AI decided and what needs a person.
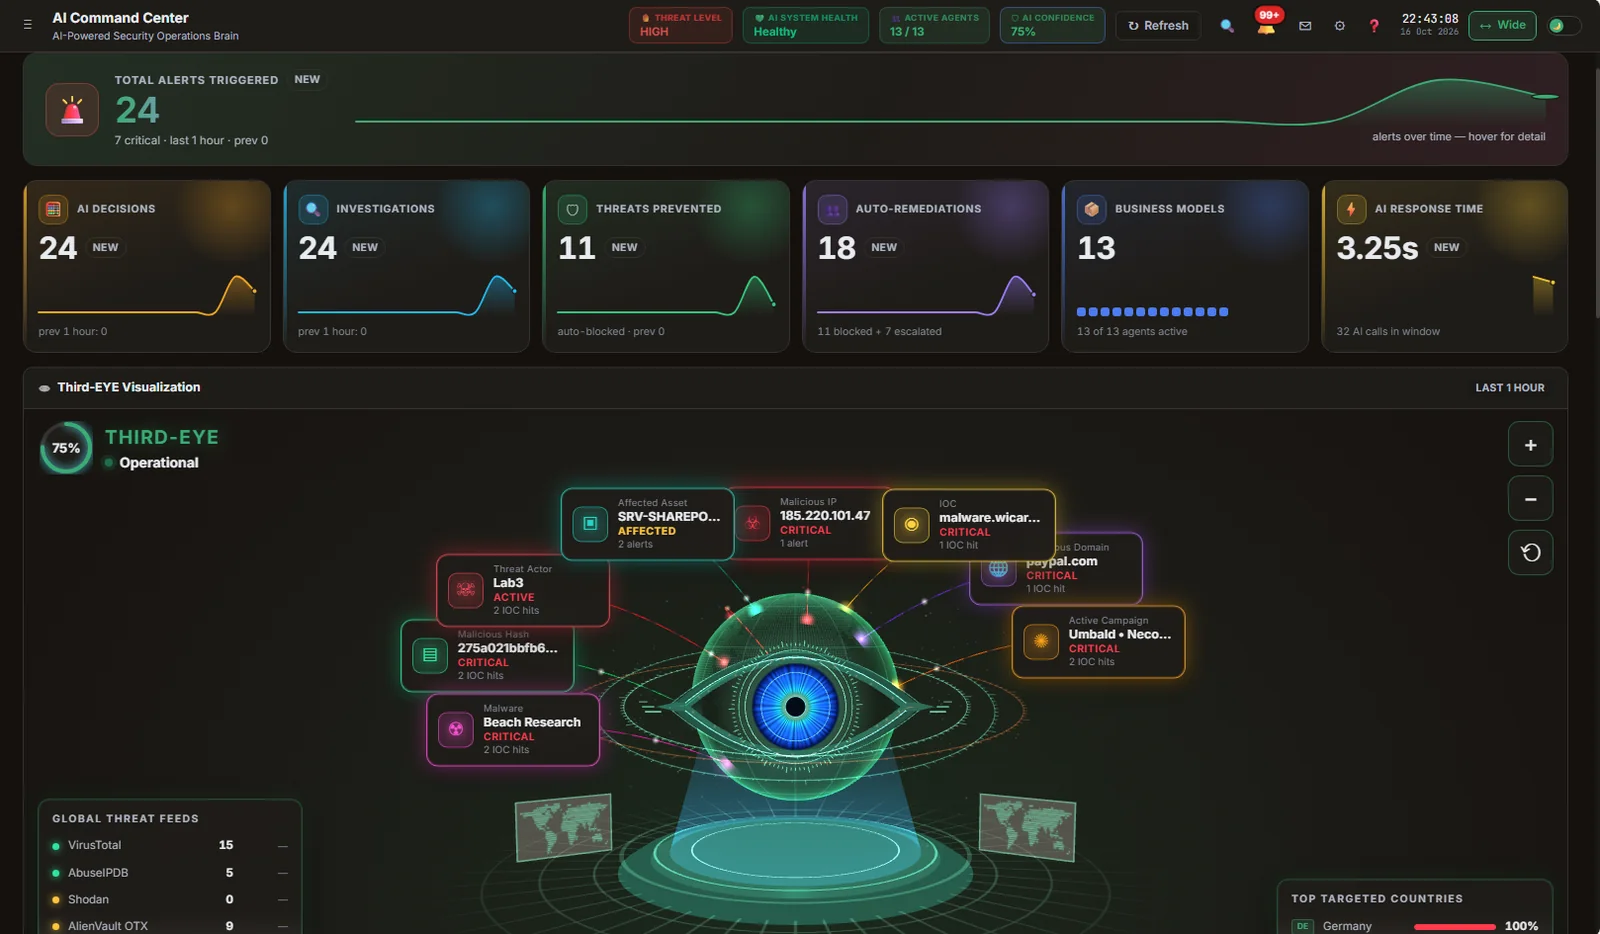
The ThirdEYE AI Command Centre: alert, decision, investigation and agent tiles above a live threat visualization.
AI Command Centre. The control room: alerts, AI decisions, investigations, auto-remediations, agents active and response time, with a live map of assets, indicators and campaigns.

Learn how this works

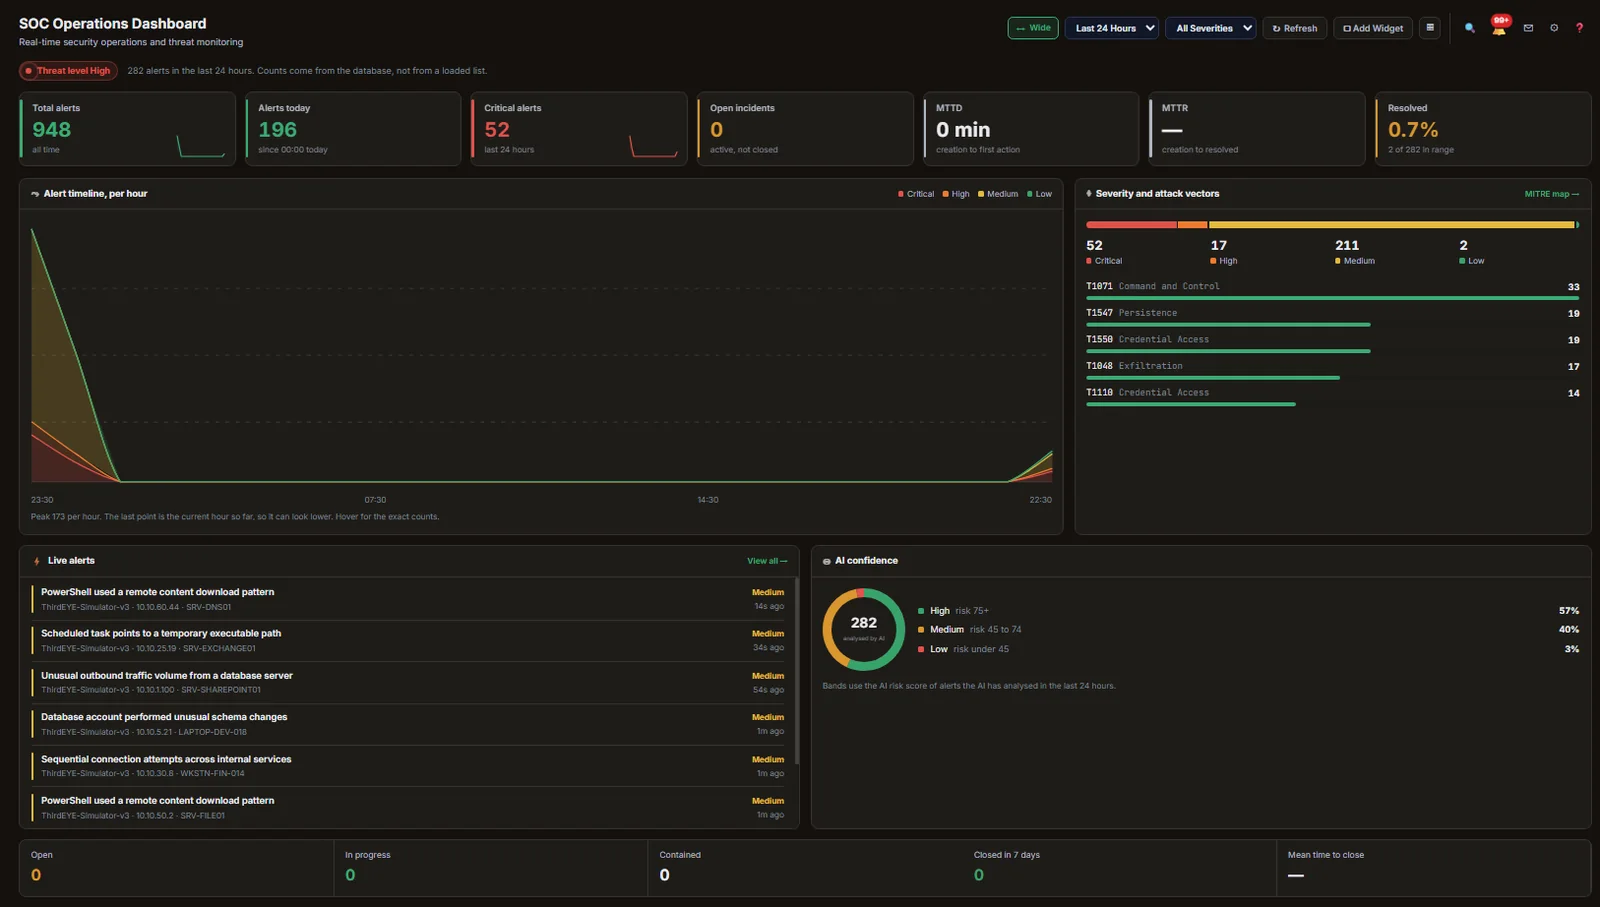
The SOC operations dashboard with alert counts, timeline per hour, severity and ATT&CK vectors, live alerts and AI confidence.
SOC operations dashboard. Totals, alert timeline, severity and ATT&CK mix, live alerts and AI confidence, with counts read from the database rather than a loaded page.

Learn how this works

Alerts and the reasoning behind them

Every alert shows the AI action and the evidence. Open one to see why the risk moved and which engine decided.
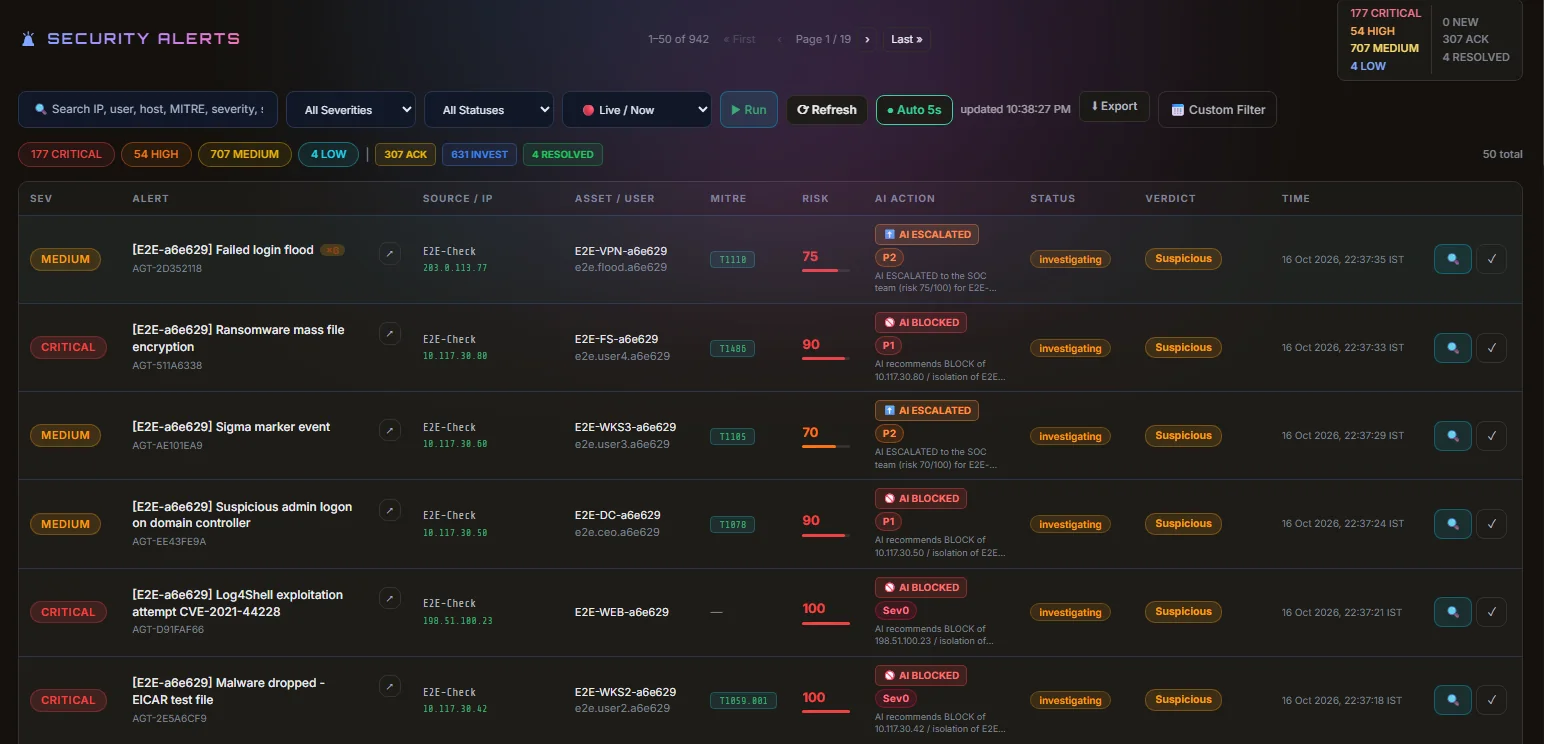
The ThirdEYE alerts table with severity, source, asset, MITRE technique, risk score, AI action, status and verdict columns.
Security alerts. Every alert with severity, source, asset, ATT&CK technique, risk, the AI action taken, status and verdict. Search, filter by severity and status, and export.

Learn how this works

Inside one alert

Verdict, CVE exploitation evidence, behaviour baseline, the SOAR decision and plain-language reasoning.
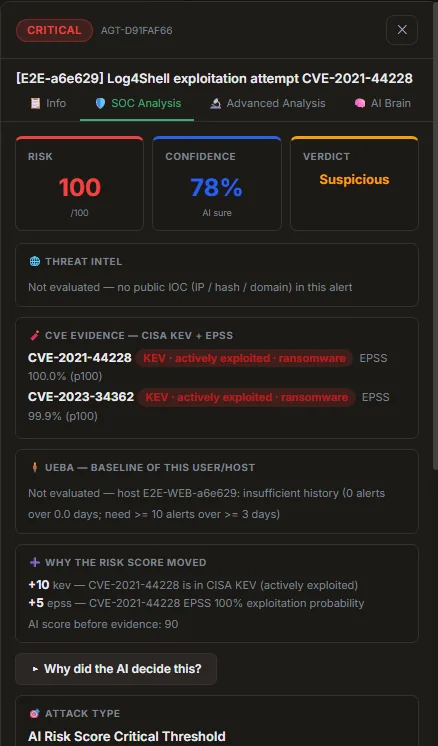
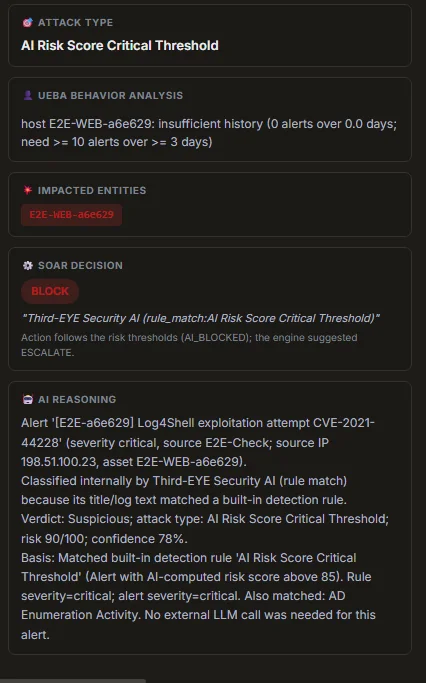
Alert detail with risk, confidence and verdict, CISA KEV and EPSS evidence, a UEBA baseline note and why the risk score moved.
SOC analysis of one alert. Risk, confidence and verdict, then the evidence: CISA KEV and EPSS for the CVE, the behaviour baseline (and when it has too little history), and exactly why the score moved.

Learn how this works

Alert detail showing attack type, impacted entities, the SOAR decision and the AI reasoning in plain language.
Decision and reasoning. The SOAR decision and the AI reasoning in plain words, including when no external model was needed because a built-in rule matched.

Learn how this works

Intelligence and AI transparency

Threat intelligence in one place, the AI view of tactics, and a log of which model handled which alert.
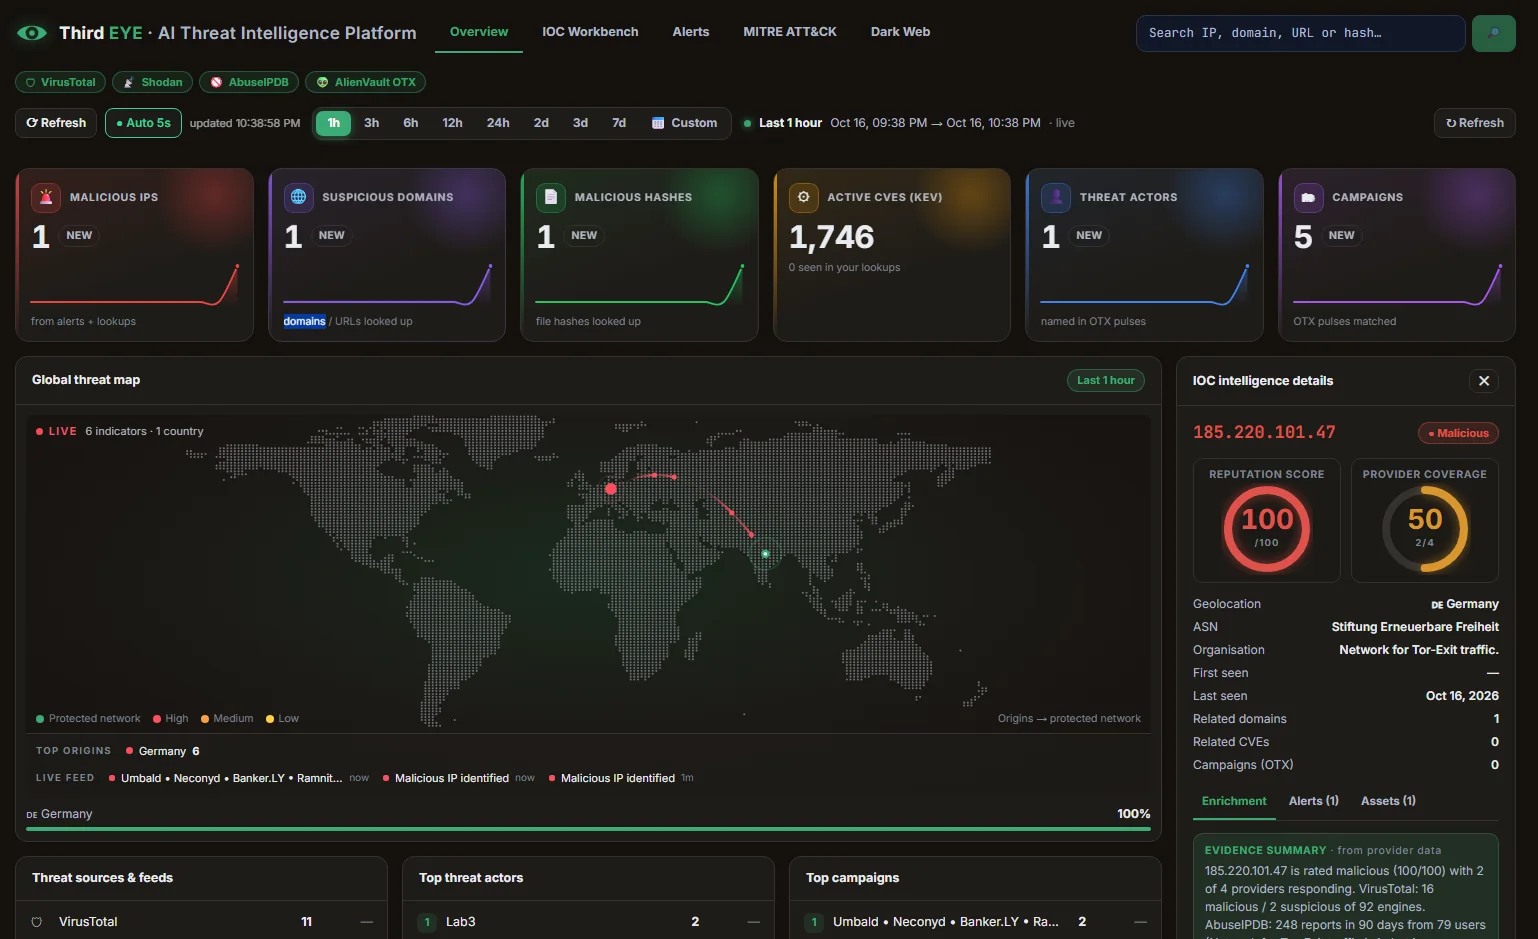
The ThirdEYE threat intelligence overview with indicator counts, a global threat map and an indicator detail panel.
Threat intelligence. Indicators, CVEs from the KEV catalogue, actors and campaigns in one view, with a per-indicator panel combining provider evidence.

Learn how this works

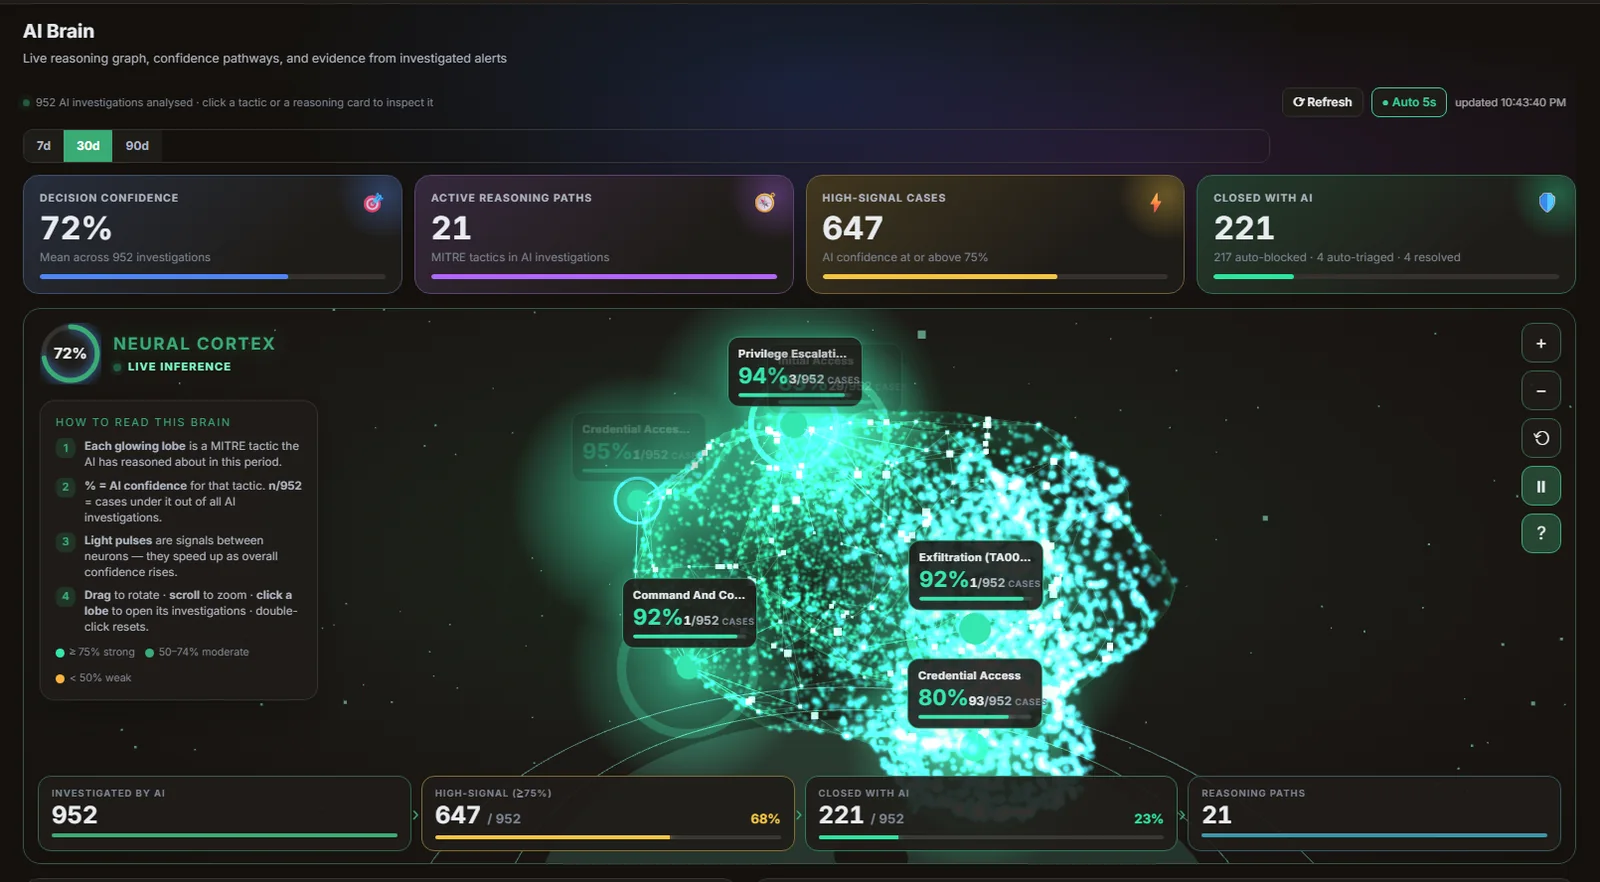
The AI Brain view showing decision confidence, reasoning paths and ATT&CK tactics the AI has reasoned about.
AI Brain. Which ATT&CK tactics the AI has reasoned about, how confident it is on each, and how many investigations it closed.

Learn how this works

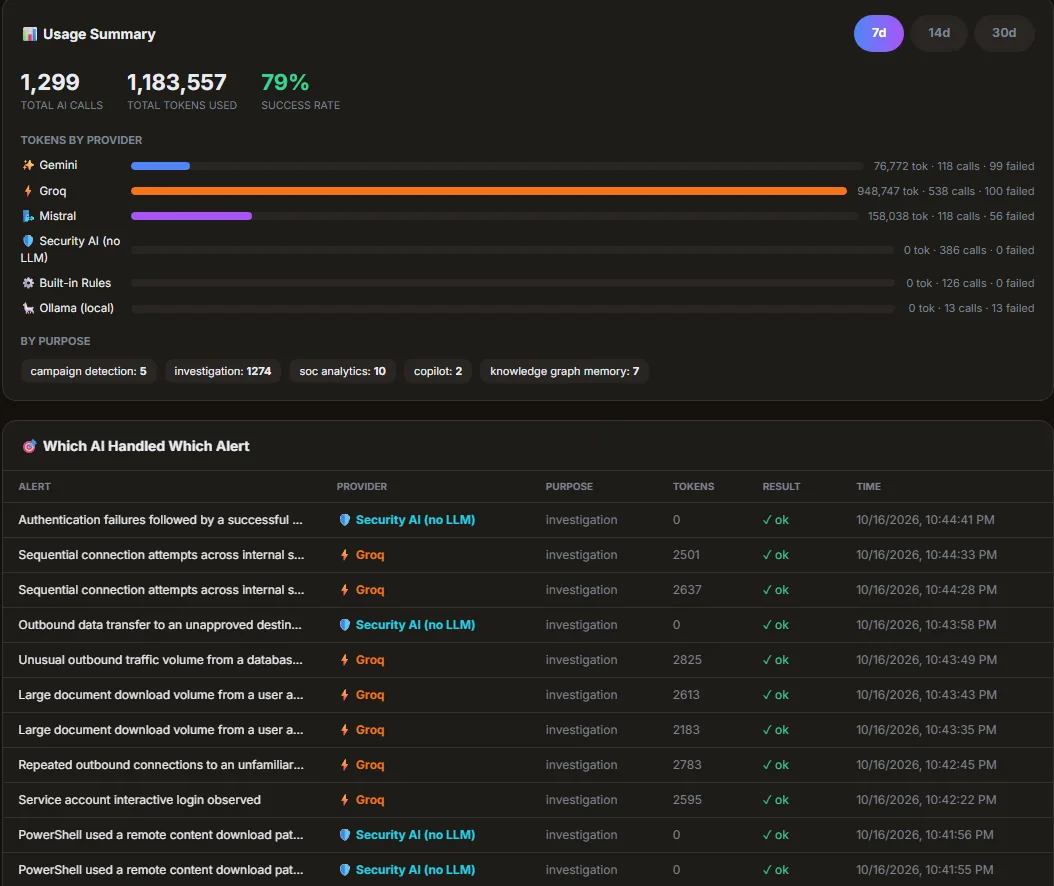
AI usage summary with calls and tokens by provider, including Security AI with no LLM, built-in rules and local Ollama, and a per-alert list.
Which AI handled which alert. Every AI call is logged: provider, tokens, purpose and result, and which alerts were resolved by Security AI with no model at all. Failed calls fall through the chain.

Learn how this works

Make it yours

Switchable themes on the same console.
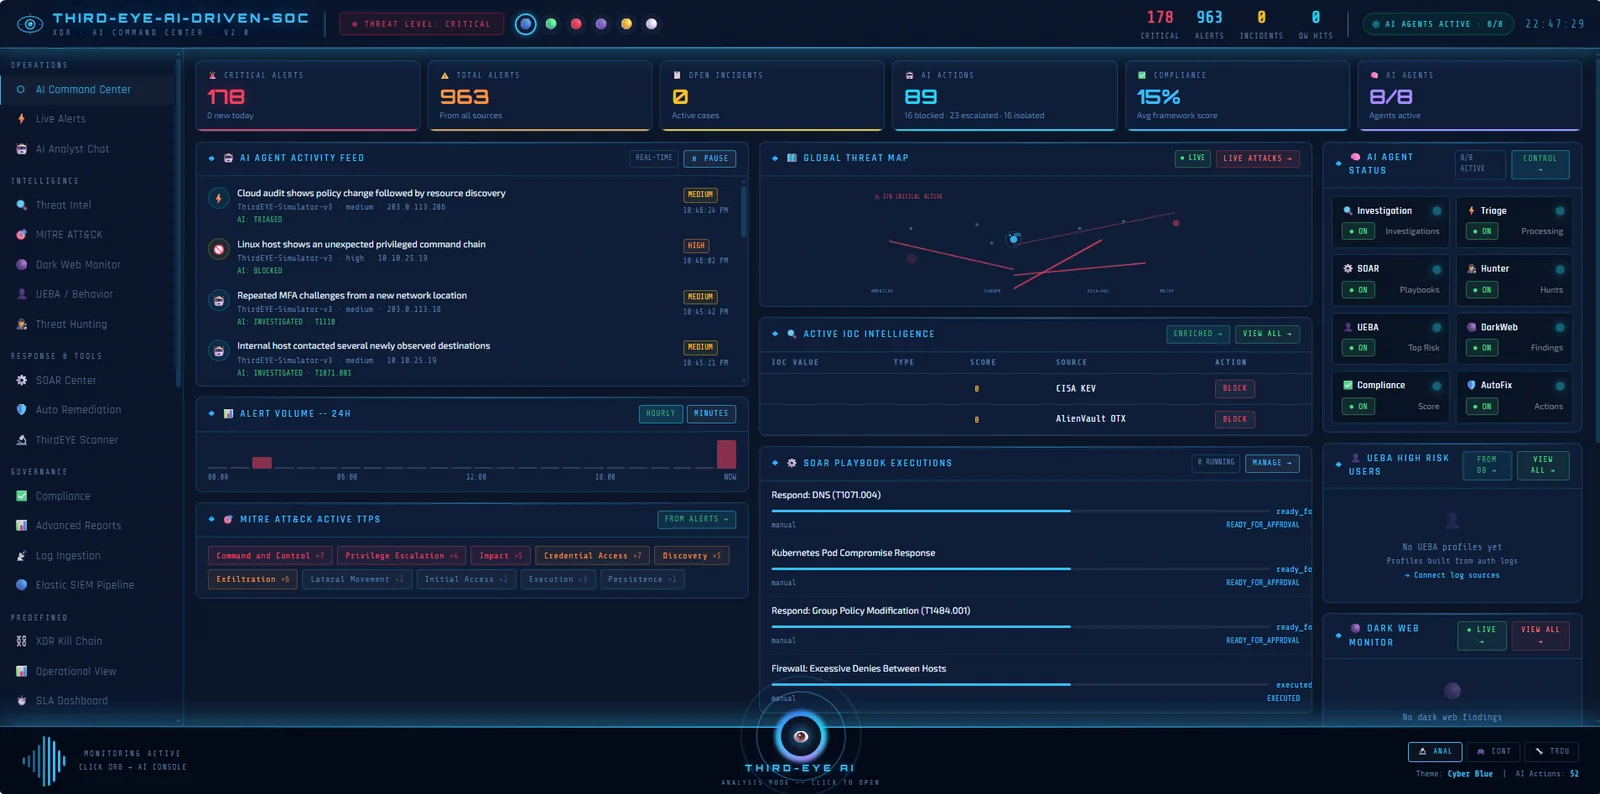
The ThirdEYE console in its Cyber Blue theme with navigation, agent activity feed, threat map and playbook executions.
Cyber Blue console theme. The same console in a Cyber Blue theme: navigation for intelligence, response and governance, the agent activity feed, MITRE techniques and playbook executions.

Learn how this works

Want to see it on your own alerts?

We will run a live session with your kind of data and show each of these screens working.